Wednesday, December 29, 2010

Secret Santa

Santa visited my house a couple weeks early when I received a surprise package from my Secret Santa.  Shortly after Thanksgiving, Nicole announced Lillyella’s Secret Santa Gift Exchange.  It was so much fun making a gift for another beadaholic!  I won’t reveal the name of my target – I’ll let her do that when she’s ready.

I was so surprised a couple of weeks ago when I received this adorable package in the mail from Genea Crivello-Knable of Genea Beads:


Doesn’t Genea have cute handwriting?


Genea packaged my gift with a “snowy” theme, since she knew I’d be snow-less celebrating Christmas in Florida.


And what to my wondering eyes did appear?  Why, a strand of Genea’s handmade lampwork beads – how cool is that?!!!


Aren’t they luscious?  Thank you so much, Genea – I love them!!!  And thank you, Nicole, for organizing the swap.  It was tons of fun!

My family celebrated Christmas a couple of times this year.  My sister and her family came over last week for dinner and gifts, and then my parents, son, daughter, and I spent the holiday weekend at my step-sister’s house in northeastern Florida.  What a wonderful week!

One of our family’s traditional holiday desserts is Orange Candy Cake.  The recipe makes a very rich, thick batter.  I fondly remember my mother showing me how to mix the batter with my hands when I was a little girl.  The cake looks similar to a fruit cake, but I promise you that it tastes nothing like one!  It’s got great texture from all the goodies inside, and is very rich and moist.  I just enjoyed the second-to-last-slice of this year’s cake with a cup of decaf chai latte.  Yum!  Thought I'd share the recipe with you in case you're so inclined.


Orange Candy Cake
From the kitchen of Lisa Tracy

Cake:
1 cup (2 sticks) butter
2 cups sugar
5 eggs
1 Tbs. vanilla extract
8 oz. package dates, coarsely chopped
1 lb. package orange slice candy, coarsely chopped
2 cups pecans, chopped
4 oz. flaked coconut
4 cups sifted all-purpose flour, divided
½ tsp. baking soda
1 tsp. salt
¾ cup buttermilk

Orange Syrup:
½ cup orange juice (no pulp)
½ cup sifted confectioner’s sugar

Cream butter and sugar until fluffy.  Beat in eggs, one at a time.  Add vanilla extract.

Mix dates, orange candy, pecans, and coconut with ¼ cup flour.  Sift remaining dry ingredients and, alternating with small amounts of buttermilk, fold into the creamed butter mixture.  Then fold in the fruit/nut mixture.  This makes a very stiff batter that may be mixed with your hands.

Spoon batter into a well-greased and floured angel food pan.  Bake at 300°F for 2½ hours.  Remove cake from oven.

While cake is still hot, whisk together orange juice and confectioner’s sugar to make a syrup.  Set cake on cooling rack or a dinner plate and pour syrup over top of the cake.  Allow syrup to soak into cake overnight.  When cake is cool, cover with aluminum foil.

To serve, invert cake onto wax paper lined plate, then invert again onto cake plate so that cracked top of cake is facing up.  Slice with narrow blade knife.

Sorry for the crummy photos -- the lighting was awful!

I hope you had as blessed a Christmas as I did!


Thursday, December 23, 2010

A Sketchy New Year

For the first forty-some-odd years of my life, I considered myself the least creative person on the planet.  Give me a pattern any day and I’d happily follow it.  But ask me to design something unique and I was hopeless.

It turns out that as I gradually became more proficient at a wide variety of beading techniques, a tiny spark of creativity was born in my soul.  Continuing to strengthen my technical skills fanned that spark into a little flame, and eventually I found my muse.  She’s an irreverent witch, and I’m quite sure she finds it hilarious that I no longer have nearly enough hours in the day to implement the designs she suggests.
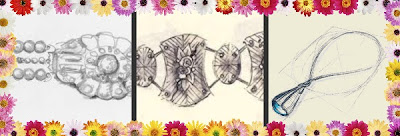
Can you believe that this sketch is supposed to represent...

...this???
Out of sheer desperation, I began “sketching” design ideas.  I even bought myself a sketchbook, a few decent pencils, and a couple of those step-by-step drawing books.  I suppose I hoped that I’d be able to go from sketching a cylinder to drawing a horse in mid-gallop in three easy lessons.  After all, that’s what the books seem to suggest I should be able to do.  Boy, oh boy, were they wrong!
This sketch is meant to represent the wreath earrings below.
Christmas Wreath earrings (Swarovski crystal, Miyuki 11/0 seed beads, sterling silver)
My “sketches” are stick-figure simple with lots of text added to explain details that I’m not skilled enough to illustrate.  It gets the job done.  Sort of.  But it sure is embarrassing when I want to show someone else a design idea.  They’re usually polite enough not to guffaw too loudly, but I know it’s not easy!  And my ultra-simple “sketches” don’t give me any sense at all whether the design is worth implementing.  I don’t even get the most basic feedback, such as whether a piece is well balanced.

A design idea that came to me as I was shopping at GoodyBeads.com today.
Last week, as I was catching up on my blog reading, I found that a very talented jewelry designer, Jeannie Dukic, is generously offering to share her expertise with those of us who are somewhat drawing-challenged.  Jeannie’s Drawing Lab will be 52 weeks of baby steps that “help you to see drawing as a pleasurable activity rather than as an opportunity to beat yourself up.”  Does that sound like me, or what?

Each week, Jeannie will e-mail an assignment to her students, giving us until Sunday to complete it.  We’ll share our scratches, er, sketches on a Flickr group.  It’ll be fun to see the progression of talent as Jeannie works her magic on us.  And even more fun is the group of jewelry artists who’ve already registered for the workshop.

*sigh*  I sure wish I could sketch like Jeannie does!!!
I’m really looking forward to the Drawing Lab, and was amazed that Jeannie’s got it priced at only $30 through December 24, then $35 thereafter.  That’s what, something like 58 cents per lesson?  Call me sold!

If you’re interested in joining the fun, head over to Jeannie’s blog here.  And in the meantime, I hope you have a very happy Christmas and many blessings in the new year to come!
 

Thursday, December 9, 2010

Vibrant Color

Photo courtesy of Dreamtime.com
I use Yahoo e-mail, and when switching between accounts, occasionally glance at the headlines in the TODAY section on the Yahoo.com webpage.  Since I love bright colors, their announcement of Pantone’s Color of the Year for 2001 jumped right out at me.  But honeysuckle?  Seriously???

Cable sweater from Old Navy
What color do you think of when you think of “honeysuckle”?  Me?  I think of white and yellow flowers, somewhat like these:

Photo courtesy of Duke.edu
So why on earth would Pantone choose to call a bright lipstick pink, “Honeysuckle?”


Well, I suppose if you do a Google image search, you’ll find these:

Trumpet Honeysuckle from Triangle.com
Golden Flame Honeysuckle from Blogspot.com
Now don’t get me wrong, I love bright colors, including bright pink.  Bright colors always make me feel good.  A dynamic reddish pink, Honeysuckle is encouraging and uplifting. It elevates our psyche beyond escape, instilling the confidence, courage and spirit to meet the exhaustive challenges that have become part of everyday life.” [Pantone]

I’m a little apprehensive about working with Pepto -- er Honeysuckle Pink, though, because it’s one of those awkward colors.  Cracked me up when I read that Pantone advises, “It is an appetite and conversation stimulant when used on the dining room walls.”  I tried painting my dining room walls Honeysuckle Pink once.  Growing up, my parents had always advised painting room using a color lighter than you want it to appear when finished.  Thinking I’d end up with a nice, deep red, I chose a lighter version similar to Pantone’s Honeysuckle.  The room made me nauseous!  Didn’t take long to learn that lesson – it’s okay to paint a room deep red!


I headed over to http://www.colorcombos.com/ and used their Combo Tester to try out a few palettes.  The palette above is loosely based on another palette I found on their website.  I could work with that, but I think I like this one better:


I really like the way the white and dark chocolate tone down the lipstick pink.  I can see using ivory freshwater pearls and antiqued brass in a design.  But that green just seems a bit too warm, doesn’t it?  Even though the green in the first palette is warmer, the burgundy and silver balance the temperature better.  Just for grins, I switched out the green for my favorite color:


Oooooh!  I love that palette, and I can actually see myself working with it.  Amazing the difference one little color can make!

So what colors do you envision blending with Honeysuckle?  Thank you so much for stopping by today!

Friday, December 3, 2010

Challenge of Color

Have you ever participated in a blog hop?  They’re a lot of fun, and I hope you’ll climb aboard and join us for Erin’s Challenge of Color Blog Hop today.

About a month ago, Erin challenged her readers to design jewelry based on a paint chip palette that she selected for each of us.  No two participants received the same palette.  When I e-mailed Erin to join the challenge, I asked her to select a palette for me that’s outside of my comfort zone.  She responded by mailing an earthy paint chip palette to me:


When I first saw the paint chips, I thought that perhaps I had made a mistake when I encouraged Erin to choose colors outside of my comfort zone – this palette isn’t even on the same planet as my comfort zone!  But as luck would have it, I had recently ordered a few ceramic links by Kylie Parry, including a textured coin that is a perfect match for “Fiery Volcano”.  So perhaps Erin’s choice was more fortuitous than I thought at first.

I left the paint chips and ceramic link on my bead table for a couple of weeks, hoping that my muse would guide me somehow.  She must be on strike, though, because inspiration never struck and I finally forced my migraine-riddled bod to sit at the bead table for a couple hours yesterday.  There’s nothing like a looming deadline to get my creative juices flowing.

When I design to a particular palette, I tend to pull out a wide variety of matching beads from my stash without deciding whether I’ll actually use them or not.  It’s sort of like brainstorming, where you write down anything that comes to mind without censoring.  I approach my stash with the same mindset – if the bead will work within the prescribed palette, it lands on my work surface.  It’s a messy way to design, but it works for me!

Among the beads I pulled out are everlasting curly shells that looked something like this before I unstrung them:

Photo from Fire Mountain Gems
Turns out that over the Thanksgiving holiday, my daughter (Christine), my niece (Sarah), and I visited a wonderful little bead shop in Helena, AL, Bead Biz.  Keeping in mind Erin’s palette selection, I found a strand of everlasting shell pendants that immediately caught my eye.  I added a simple antiqued brass wire-wrapped bail to form a pendant:


Once I connected the pendant to the ceramic link with a bit of copper chain, the rest of the necklace seemed to fall into place with little effort:


In addition to the ceramic link and shell pendant that match the “Fiery Volcano” chip, I added freshwater pearls to match “Tumbleweed Tan,” and a dyed jade nugget to add a dash of “Wild Seaweed.”  Antiqued brass and copper chain and wire add depth to the earthy palette.  As luck would have it, I found a gorgeous length of velvety ribbon from Larkspur Funny Farm and Fiber Art Studio.  The ribbon blends all three shades beautifully and adds versatility to the design. 

Finally, since I can’t seem to craft a necklace or bracelet with also designing matching earrings, I scaled down the components for super-simple danglies:


As Erin requested, I’ve named my design in keeping with the paint chip names:  “Fiery Beach.”

Thanks for stopping by today!  I hope you have as much fun hopping the blogs as I did meeting Erin’s challenge.  Now please scroll down for links to the other Challenge of Color participants' blogs.

 
The Challenge of Color Blog Hop, 12/3/2010
Participants:

Lisa Tracy  [You are here]

Tuesday, November 16, 2010

A Great Day

This past Saturday I participated in a very large craft fair about 45 minutes from my home in Orlando.  The fair, called Great Day in the Country, is sponsored by the Oviedo Woman’s Club, is a juried one-day event that has been held for 35 years, and was attended by over 55,000 people last year.  I wouldn’t be surprised to learn that attendance this year topped last year’s figures.

Great Day proved to be a day of firsts for me:

·   First show of this size.  Prior to last Saturday, I had only participated in shows with perhaps 30 - 50 vendors.  Great Day had over 325 vendors.

·    First outdoor show.

·    First show where I had an actual booth, and was required to bring a canopy, tables, chairs – everything except for the grass under my feet!  I was allocated a 10x12’ space, and could fill it any way I liked.

·    First juried show.

·    First judged show.

·    First time one of my designs won anything.  I received an honorable mention for my “A Fine Vintage” antiqued brass and oxblood necklace.  Needless to say, that was the highlight of my day!


There are several things I learned from this show, and the others I’ve participated in previously.  Thought I’d share some of those lessons learned with you.

1.    Plan ahead.  My decision to look for local shows in which to participate was recent, so I reserved my booth only 11 days before the show.  That just wasn’t enough time to prepare.  Since it was my first outdoor show, I had to invest in a canopy and tables.  I spent several hours researching canopies before I chose an EZ-Up, which I ordered online (and later found at Sam’s Club for $35 less).  I spent another few hours shopping around for tables that would fold in half and eventually settled on two 6-foot tables (from BJ’s) and one 4-foot table (Sam’s Club).  I spent several more hours shopping for vases, plants, shelves, silk flowers, sea glass, and other items that I used to decorate my booth (IKEA and Dollar Tree love me!).  All this planning and shopping was necessary, but it left me with little time to actually make jewelry.  And I ended up more stressed than I would have liked.
2.   Find a way to encourage customers to spend more time in your booth.  My favorite way to do this is with a drawing.  For each show, I designate a piece of jewelry or a gift certificate that I offer as a prize, and have shoppers fill out entry forms with their name and contact information.  I include a check box at the bottom of the form that the shopper marks if they prefer not to receive e-mail newsletters from me.  Most shoppers who pause a few seconds to look at your work will be enticed by the idea of possibly winning some of your work.  I’m convinced that my sales are higher as a result of encouraging shoppers to stay in my booth a little longer.  Which makes the cost of the prize well worth the investment.  The entry forms are also a great way to collect contact information.  I now have a database of shoppers whom I’ll send information about upcoming promotions in my online store.

I gave away a Nativity Story bracelet in my drawing at last Saturday's craft show.

Another trick that encourages shoppers to linger is to offer something free of charge.  I always add a candy basket to my table/booth – shoppers who’ve been on their feet for awhile appreciate the boost.  And it appeases cranky little ones who would rather be anywhere than craft show shopping with mom.  For Great Day, I also gave out 3x3” anti-tarnish zip-top bags that I ordered from Fire Mountain Gems and Beads.  Each bag had a card inside with my business name and contact information.  I think next time, though, I’ll print my business information on clear labels and stick one to each bag.  My thinking is that the label would be less likely to be thrown away than the card.  And who knows, if my business grows large enough, I might be able to order custom printing on the bags someday!
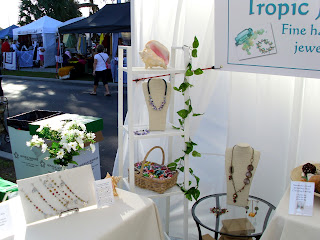
3.   Recruit assistants.  I was very fortunate to have both my 19-year old son, Ryan, and my good friend, Carol, to help me set up and tear down my booth.  Carol has a great eye for decorating, so I turned her loose with the vases, bowls, silk flowers, sea glass, plants, and other props I had brought.  My goal was to turn my booth into a boutique, as Lori Anderson does with her craft show booths.  I think Carol accomplished just that, don’t you?

Carol puts the finishing touches on the booth.

Carol also helped handle customers when it got busy and Ryan kept a smile on his face even when I dragged him from store to store, shopping for tables and props.  OK, I’ll admit he griped a bit when I asked him to help me do a dry run of setting up the canopy in our back yard, but in the long run, he really came through for me.
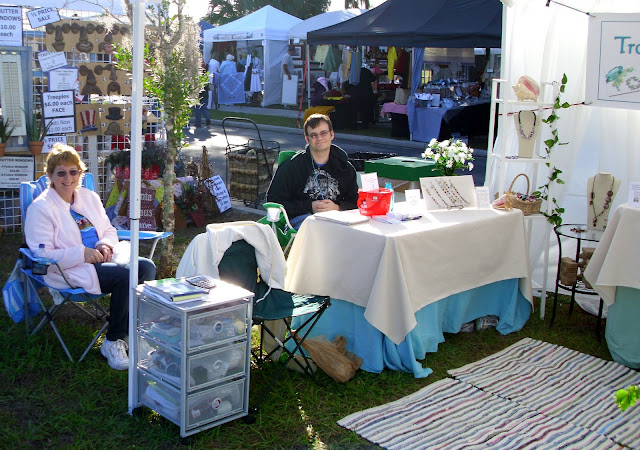
The most awesome assistants in the whole wide world!

4.   Make your booth look enticing.  I was fortunate to have Carol’s decorator talent for my booth.  I didn’t get much time to visit the other booths during Great Day, but I did manage to glance at enough to know that my booth was one of the most inviting looking.  Many crafters simply raised a canopy, set up a few tables, and dumped their wares on top of them.  They could have offered amazing lampwork for all I know, but my impression was that they didn’t respect their art enough to give it a proper presentation.  Whether it actually was or not, their work looked cheap.  I think Carol created an atmosphere that showcased my work beautifully.
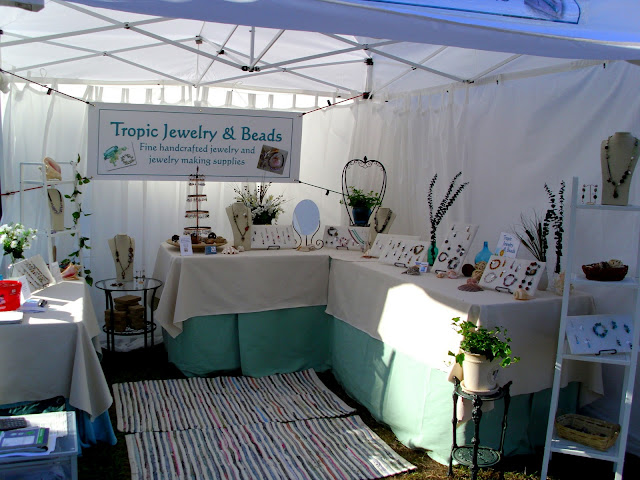
Carol's beautiful "interior" design.

5.   Accept multiple forms of payment.  Even though there were ATM’s available on the show grounds, I’m confident that my sales were higher because I accepted personal checks and credit cards.  There are several inexpensive methods of processing credit card transactions – I’ll share one of them with you in my next blog entry.  If you’re planning to participate in a show and don’t already have a merchant account, open one.
6.   Sharpen your selling skills.  Many years ago, I sold timeshares and was successful thanks to a couple of very good books on selling.  Those lessons have stuck with me, and have become part of my show persona.  If you’re at all uncomfortable or inexperienced at selling, visit your local book shop and pick up a book or two that covers the basics.  For example, instead of asking a customer if they want to buy the pair of earrings they just tried on, ask them if they’d like to wear them now, or if they’d prefer that you wrap them.  Either answer yields a sale for you.

Doesn't she make her new necklace, Elephant Rides, look beautiful?


I have to admit that I’m not familiar with current books on selling.  The books I learned from years ago were written by Zig Ziglar, if that helps you all.
Here are a few more photos of my booth, beginning with the right side, and rotating counter-clockwise:


I’d love to know what lessons you’ve learned while participating in craft shows.  Hope you have a lovely week!

Friday, November 5, 2010

Craft Fair Setup

Last weekend, I participated in the West Orange Women’s Holiday Bazaar (which was organized by my step-mom, Clarice).  My table reservation was last-minute due to a scheduling change, and I was fortunate that Clarice was able to fit me in.

What a beautiful day it turned out to be!  The sky was a clear blue, there was a lovely breeze (my table was in a covered breezeway), and thankfully it wasn’t too hot.  I enjoyed talking with so many new people and marveled at the creativity of the other exhibitors.

The last few days preceding the holiday bazaar were extremely rushed – so rushed that, although I remembered to pack my camera, I completely forgot to take any photos!  Which is very annoying, since I wanted to show you what my table looked like.  I promise to remember next time.

Participation in the holiday bazaar whetted my appetite for another show, so I mailed in my application yesterday (another last-minute thing) for a booth at a much larger event.  A Great Day In the Country, sponsored by the Oveido Woman’s Club, will be held on November 13.  There are 325 booths and last year over 55,000 people attended.  Wow!  That’s WAY larger than any other show I’ve participated in.  So I’m a bit intimidated.  To add fuel to that fire, I’ve never had to bring my own canopy and tables before.

If you’ve got advice, I’d love to hear it!

My booth will be 10 x 12’.  I’ve ordered an EZ Up “commercial” canopy that’s 10 x 10’, has roll-down sides in case it rains, and a small awning that extends a bit at the front of the canopy. 


No, that's not me, this is a stock photo from HutShops, from whom I ordered the canopy.

I’ve been researching online, looking for attractive craft show setups, and found a gorgeous booth that Lori Anderson (a gifted jewelry designer) set up a couple of years ago.


Lori explains in her blog that she likes to create an environment that’s more than just tables, tablecloths and jewelry displays.  Lori builds a boutique in her booth, decorated in rich colors to entice visitors.  I’m quite sure that I won’t be able to pull off such a stunning display, but the “boutique” approach is what I’m striving for.  With that in mind, Clarice and I had fun in our local IKEA last night.  I picked out a few tall, skinny shelf units to add interest at a level other than table height.  (The next three photos are courtesy of the IKEA website.)


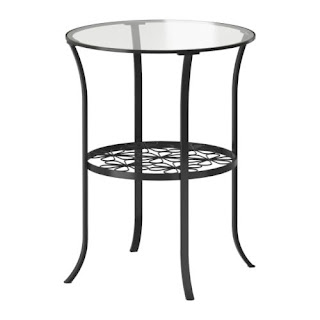
I also picked up one of these glass-topped tables:

I love its curvy lines!  I’m thinking of spray painting it a bronzy color, or maybe antique copper – something that will blend well with my ivory table coverings and turquoise underskirts.  I also bought a few clear vases in different shapes and sizes that I’ll fill with silk flowers or greenery.  And I fell in love with this hand-blown glass plant pot:

So my next worry is planning how I’ll arrange everything in the booth.  Here’s my first draft of a layout – what do you think?


Since my canopy is 10x10’, that’s the dimensions I’m working with.  The blue squares are the skinny white shelf units I bought at IKEA.  I picked out a lightweight metal mesh unit on casters that has 3 drawers that I’m thinking of using for a check-out stand.  I’ll store bags, gift boxes, organza bags, extra receipts, and such in the drawers.

I’m already wrapping up a bunch of Clarice’s seashells to use as decorations, and I still need to figure out some sort of curtain for the back and part of the sides of the booth.  Have you got any ideas?  What do you think about my plans so far?  I’d love to hear your suggestions!

Thanks for stopping by.  Have a beadiful day!

Tuesday, October 26, 2010

What Can't You Do?

I’ve connected with quite a few jewelry artisans recently whose work I greatly admire, including Lorelei Eurto, Cindy Gimbrone, Lori Anderson, and many others.  These gifted artists have influenced my own designs in a way that’s really growing on me.

Up until recently, designing asymmetrical jewelry was a huge struggle for me.  My logical, orderly brain craves symmetry and patterns, and it takes me probably three times as long to design an asymmetrical necklace as it does a symmetrical piece.  The artists whose work I admire appear to have a natural gift for creating beauty out of a seemingly random handful of beads.  Naturally, since I’m kindof an ornery person at heart, I’m determined to conquer my asymmetrical fears.  I started with a positive attitude, “I think I can, I think I can, I think I can…”


You should have seen my workspace when I was designing this necklace!  I had beads and findings strewn from one end of the table to another (and even some under the table).  Of course, I had to adjust and readjust the balance until I got it right, but you wouldn’t want it to hang catawampus, now would you?

This necklace pushed me out of my comfort zone in another way:  I used much larger scale components than I'm accustomed to designing with.  The faceted black onyx rondelles were contributed to the Beading Daily bead swap by my good friend, Sherri Solawetz.  They measure 15x10mm – about twice as large as I usually work with.  In fact, I was so taken with these rondelles, that I made another asymmetrical piece, this time a bracelet:


You know what’s got me chuckling?  Sherri told me that she contributed these gorgeous onyx beads because she struggles to work with large components.  Up until recently, I would have said the same thing about myself.  But I'm finding it's lots more fun when I erase that preconception from my mind.  A whole new world opens up!

My muse sure seems to be in “chunky” and “asymmetrical” mode lately:


So what has my recent jewelry design journey taught me thus far?  To keep things simple, to incorporate plenty of movement, than chunky doesn’t have to equal heavy-weight, and to not limit my component choices to 4 – 6mm scale.

So I’m throwing away the “can’ts” and welcoming the “can’s”.  What habits are limiting your design potential these days?  And how are you going about conquering them?

Just keep telling yourself, "I know I can, I know I can, I know I can..."

Sunday, October 17, 2010

A Most Challenging Week

Are you the kind of person who avoids a challenge like the plague, or who can’t resist the gauntlet when it’s thrown down?  In case you hadn’t guessed, I happen to fall into the latter category.  I love a good challenge – nothing seems to get my creative juices flowing quite like a bit of sport.  It doesn’t seem to matter if there are valuable prizes offered, or merely the bragging rights, you can usually count me in.

This week I’ve been working on jewelry designs for two challenges:  Lorelei Eurto’s Michaels Challenge and my own Dollar Store Challenge.

In case you’re just tuning in, Lorelei issued a fun challenge a couple of weeks ago.  She went to her local Michaels and chose 6 strands of beads (that were on sale) plus a length of chain.  She then challenged her blog readers to do the same and design a necklace using the materials from Michaels plus two others.  After you’ve finished enjoying today’s amazing blog entry, click on the next blog in the list at the bottom of this post for the Michaels Challenge Blog Hop.

I was disappointed that I couldn’t find one of the beads at Michaels (the white cinnabar coins).  You didn’t think that would slow me down, did you?  To the challenge supplies I added an assortment of brass beads and findings and some gorgeous blue-green Czech glass squares.


I love the way the brass emphasizes the feminine palette of “Elephant Rides.”  I gotta tell ya, though, that this necklace was a challenge in more than one way.  I am a very logical, step-by-step thinker, and it’s very difficult for me to wrap my brain around an asymmetrical design.  Yet I think the results are worth the struggle, and hope you agree.

A closeup of the focal of Elephant Rides
 
Simple danglies
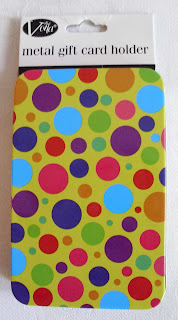
This week has been somewhat stressful, and I can’t think of a better stress-reliever than hammering on metal.  I’ve been eager to see where the metal gift card holder that I found at Dollar Tree would take me.

Remember this gift card box?
I began by using shears to cut off the rim of the box lid, resulting in a flat sheet of metal.  I hope you’ll bear with me – I’m new to metalworking and don’t own a jeweler’s saw yet.  It’s on my wish list, but meanwhile I’m making do.  I was amazed at how well I was able to make do with these shears I bought from Kim St. Jean.


To envision where I wanted to end up, I laid out the beads I had purchased with this project in mind.  I definitely had polka dots on the brain!


Note:  I don’t recommend using a Sharpie for this next step!  I then traced circles onto the front of the sheet metal with a Sharpie, fully expecting that I could remove the ink later with nail polish remover.  Unfortunately, some ink residue is left behind on the enamel, so use a wax pencil or other non-permanent writing implement.

Don't use a Sharpie!
 My shears worked quite well for cutting out these discs, although they did scratch the enamel in a few places (thankfully not inside the circles).  After cutting them out, I sanded the edges of the discs and use my dapping block set to create a gently convex surface.  Note to self:  hammering on dapping punches relieves almost as much stress as pounding on metal does.
Before using the dapping set
 All that was left was assembly.  I punched two holes in each polka dot dome so they could be used as links.  I then made additional links with brightly colored mother of pearl coins and silver-plated wire.  I ended up fashioning a clasp, and I’m not terribly pleased with the way it turned out.  (Note:  the bracelet is at the bottom of the photo below.)

Completed bracelet is at bottom of photo
 I played around with quite a few variations for earrings.  These are my two faves – which do you like better?


So what have you made recently with your dollar store bargains?


Michaels Challenge Blog Hop list:

Lorelei's Blog
Mary Harding
Hilary of Fryestyle
For My Sweet Daughter
My Life Under the Bus
Kristie of DreamSomeDesigns
Linda's Bead Blog & Meanderings
Copper Diem

Andrew Thornton
TyneBodenNecklaces
Raida of HavanaBeads
Erin of Treasuresfound
Molly of BeautifullyBrokenMe
Beading by Malin de Koning

AuntieAnnie
Gr8Findings
Deborah M Purdy
Spirited Earth

Erin Siegel Jewelry
beads by breul
Beads for Busy Gals
Cynths Blog
Nayas Organized Chaos
Crafty Hope
2 catch a hummingbird

Rosebud For the Love of Beads
Jamberry Song
Peacock Fairy
Elysian Studio Art
Designs by Debi
sweet girl design

Silver Rose Designs
Tropic Beads (you are here)
Imaginative Jewelry
Magnolia Attic